Printing
A maze leaves the studio as a file, and which file you pick decides how large it can go and what a printer can do with it. This page covers choosing a format, sizing for the surface, and four jobs worth doing carefully: puzzle books, posters, shirts and signs.
Pick a format#
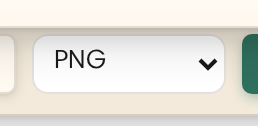
The Download control offers three formats, and the studio labels each with its tier: PNG, SVG (paid) and PDF (paid).
- PNG — a raster image, and the free option. Right for the web, for a quick proof, or for dropping into a document.
- SVG — vector, paid. The file to hand a print shop, a vinyl cutter or a screen printer: it scales to any size.
- PDF — a print-ready page, also vector and also paid. What most print services ask for first.
Whichever you choose, the file is re-rendered on our servers from your recipe rather than captured from the canvas in front of you — so what lands in your downloads folder is a fresh, full-fidelity render, not a screenshot. For a format-by-format comparison, including the maze document, see Export formats.
Why vector matters on paper#
A raster image is a fixed grid of pixels: enlarge it and you enlarge the pixels. SVG and PDF store the maze as geometry — lines, arcs and fills — so they are resolution-independent. The same file prints cleanly on a postcard and on a banner, and nothing about its final physical size is decided until you place it.
Two engine details make that scale-freedom real rather than theoretical.
- Every layer width is a percentage of cell size — walls, the interior inset, the border stroke. Proportions are preserved, so a design that reads well at 25 pixels per cell reads the same at 200. The widths live on Layers.
- Round corners are real curved geometry — curves that preserve straight runs, not clipped corners — so they stay smooth however far the file is scaled up.
Puzzle-book pages#
Book pages are small and the printing is unforgiving, so the failure mode is always the same: corridors that close up. Fight it with fewer, larger cells than the screen tempts you into.
- Start sparser than feels right. A grid that looks empty at desk distance usually looks correct once it is only as wide as a page.
- Leave the binding edge alone. Place the maze in your layout with a generous inner margin so the gutter never swallows a corridor — the maze has no idea where the spine is.
- Give it a border. A stroked frame (see Layers) stops the puzzle floating on the page and gives the trim a little tolerance.
- Keep it black on white. High contrast survives cheap paper, photocopiers and second-hand scans better than anything clever.
- Keep the recipe. The seed reproduces a maze exactly, so a reprint years later is a re-render rather than a redraw — see What is a maze seed?.
Posters and wall art#
A poster is read from across a room and then walked up to. That double duty is a composition problem more than a resolution one: you want a silhouette that reads at a distance and detail that rewards standing close.
- Go vector. With SVG or PDF the printer sets the size, not you — a wall-sized print is the same file as the desk-sized proof you approved.
- Fewer, bigger cells read better than a dense grid. Density becomes texture at distance, and texture goes grey.
- Let a shape do the far-away work. A maze grown inside a silhouette is legible long before its corridors are — see Shapes & masks.
- Decide the backdrop deliberately. Canvas is transparent by default (that is the checkerboard in the studio); give it a color when you want ink, not paper, to define the background.
- A Single path maze makes an unusual poster — one continuous route with no junctions, which reads as pattern from across the room and as a puzzle up close. Square and diamond grids only.
Shirts and apparel#
Fabric is the least forgiving surface here. Thread moves, ink spreads, and thin lines are the first thing to go — so apparel wants a heavier, simpler version of a design that would be fine on paper.
- Thicken the walls before you send it. A stroke that looks bold on screen is often marginal on a shirt, and because widths are relative to cell size the heavier look holds at whatever size it is printed.
- Simplify the stack. Every enabled layer with its own color is potentially another ink; switching off the ones you don’t need leaves the walls doing the work, which is usually cleaner and cheaper.
- Prefer fewer, larger cells. A grid that is comfortably legible on a page can collapse into texture on a chest print.
- Send vector. Screen printers and direct-to-garment shops both want SVG or PDF — they separate and scale from vector far more happily than from a raster.
- Say what you mean about transparency. A transparent canvas means “garment color shows through”, which is usually right — but put it on the order rather than leaving it to be guessed.
Signs and wayfinding#
Signage is read at speed and at distance, often outdoors, and often cut rather than printed. That pushes every decision the same way: bigger, bolder, fewer parts.
- Vector is not optional here. Vinyl cutters, laser cutters and routers follow paths, so they need SVG or PDF — a raster is of no use to them.
- Talk to the fabricator before you finalise. A maze has a great many paths, and which of them become cut lines rather than printed lines is a conversation worth having early.
- Contrast beats color. Dark walls on a light field — or the reverse — survives weather, glare and a passing glance.
- Round corners rather than square ones. They are real curves in the geometry, and a cutting tool generally prefers a curve to a hard angle.
Sizing and line weight#
Cell count is not size#
Two different numbers get called “size”. Width and height are cell counts — how many cells across and down, which is really how hard the maze is. Cell size is pixels per cell — how big one cell renders. Both live on Size & seed.
Cell size accepts 6 to 120 pixels and defaults to 25. It sets the pixel scale of a raster render. A vector file carries the same shape whatever you set it to — the intrinsic size changes, but you rescale vector at placement time anyway — so on SVG and PDF it is mostly a proof-viewing convenience.
Line weight#
Because every stroke width is a fraction of cell size, weights are relative, not absolute: raising Cell size makes everything bigger together and the design never thins out. To change how heavy the walls are relative to the corridors, change the Walls layer’s width instead — that is the knob that actually alters the look. See Layers.
Free and paid, plainly#
PNG is free. SVG and PDF are paid. That is the whole split, and it applies the same way signed in or not — a free download is a real download, not a preview.
- Free — PNG downloads, at the size you render them, carrying the brand bar.
- Paid — SVG and PDF unlocked, and PNG downloads without the brand bar.
Nothing about the maze itself is gated. Same generator, same seven layers, same seed, same geometry — paying changes which file you can take away, not what you are allowed to make.
The brand bar#
A free PNG download carries the brand bar — the attribution strip below your maze, which the pricing page still calls the watermark. It is appended below the maze frame and it extends the height of the image: nothing is covered, cropped or tinted, but the file you receive is taller than the maze frame by the height of the bar.
By default the strip is 40 pixels tall and dark, with light centered text reading Created with Mazedly. It is composited into the render on the server, so it is part of the image that arrives — there is no switch for it in the studio.
- A free PNG download — barred.
- A paid caller’s PNG download — no bar.
- SVG and PDF — never barred, at any tier.
- Saved-maze thumbnails — the small
cardimage is never barred.
Before you send it#
A short list that catches most of what goes wrong between a good maze and a good print.
- Decide the surface first, then the cell count. Density is the one decision you cannot fix later without changing the maze.
- Ask the printer what they want. If the answer is vector, that means SVG or PDF, and it is worth the paid download.
- Set the Canvas deliberately — a color when ink should define the background, transparent when the paper or the garment should.
- Check the smallest gap at final size, not at screen size.
- Note the seed and the maze’s name, so a reprint is a re-render rather than a redraw.
- Proof one before you order many.