Entry, exit & solution
Every maze has exactly two gates — a way in and a way out. This page covers where they sit, how to move them, the artwork you can hang at each one, and the layer that draws the solved route.
The two gates#
The Entry & Exit section sits in the tool list just after Shape. It holds one card per gate — the entrance first, then the exit — and nothing else: a maze always has both, so there is nothing here to add or remove.
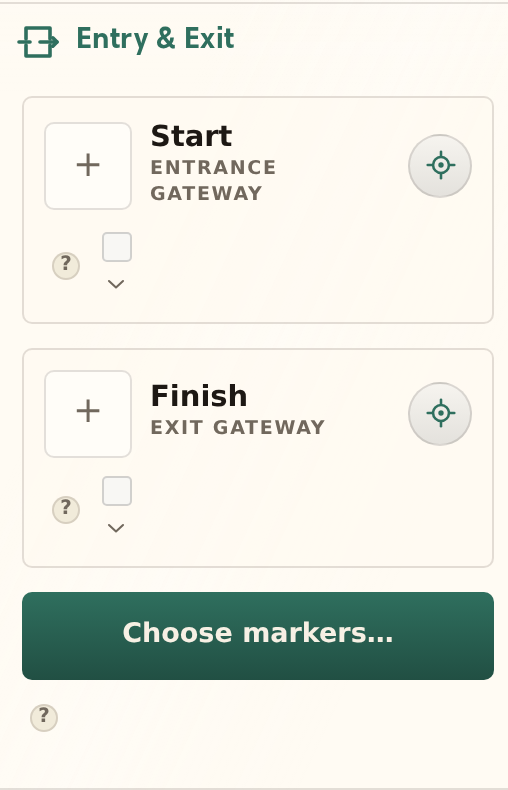
Closed, a card is a single summary row. Left to right it carries the marker artwork, the gate’s name over its type, and the two controls you reach for most:
- Start or Finish, over Entrance gateway or Exit gateway — click either line to open the card.
- The locate target, which puts the gate somewhere else on the maze.
- The show checkbox, which hides the gate’s marker without forgetting anything about it. It stays greyed out until the gate has one.
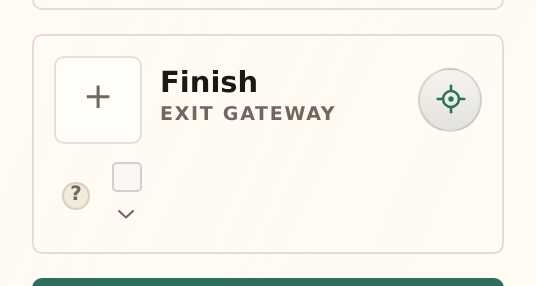
Open a card and its first line reports where the gate actually landed — At cell 4×1. Only one card is open at a time, and both start closed.
Moving a gate#
Click the locate target and the maze goes live for picking: Click a highlighted boundary cell on the maze. Click one and the gate moves there. Escape cancels without moving anything.
- Only boundary cells light up — a gate has to open onto the outside.
- The cell the other gate already occupies is never a candidate; the two can’t share.
- On a maze grown inside a shape, the edges of a hole count as boundary too, so a gate can open into a courtyard.
Two settings take the choice out of your hands. With Find longest path on, the search picks both endpoints — the locate targets read “The longest-path search chooses the endpoints” and stay disabled. And with Single path set to Unicursal or Woven, the exit is placed beside the entrance by construction, so only the entrance is placeable and the exit follows it. See Unicursal mazes for why.
Markers#
A marker is a picture hung at a gate — an arrow, a doorway, a little car, whatever says “in” and “out” for the maze you are making. Open a card and click its thumbnail, or use Choose markers… at the foot of the section — it reads Browse markers once a gate has one — to open the browser.
The browser is three regions, and they stay put as you browse:
- Sources down the left — the Symbol libraries we curate, your own My uploads collection as a peer of them, and a greyed-out Coming group for what is not here yet.
- The tiles in the middle, with Search across the current source — or switch it to Everywhere to search the lot.
- About this marker along the bottom, which names the Author, Collection, License and Source of whatever you are pointing at.
The Entrance / Exit buttons at the top decide which gate a pick lands on, and Use for the entrance places it. Choosing a new picture for a gate that already has one swaps only the artwork — every size, offset, angle and flip you set stays exactly as it was.
Size & placement#
Size is a percentage of one cell, so a marker keeps its proportion to the maze whatever you print it at. Under Fine-tune, Offset pushes it further from the opening, again measured in cells.
You can also just drag the marker on the maze: the drop point sets its offset and its direction together. With the marker focused, the arrow keys nudge it in and out.
Direction & rotation#
Direction is which way the marker sits away from the gate. On Auto it goes straight out of the maze, which is right almost always; click Auto to take over and set the angle by hand in 15° steps.
Rotation turns the artwork itself. On Auto a directional picture aims along the way you travel — the entrance points in, the exit points out — and Flip mirrors it horizontally or vertically, so a car can drive the other way.
Colour#
Colour is the same picker every paint layer uses, and its transparency slider is the marker’s opacity — there is no second control for it.
Until you pick a colour, a marker simply matches your Walls — restyle the maze and the gates follow it. Once you have picked one, a Match walls link appears beside the swatch to hand that job back.
Your own images#
My uploads in the browser is your own collection. Upload an image takes SVG, PNG or JPEG, and every upload joins the collection so you can reuse it on any maze.
- SVG is the one that recolours, so line art and icons are best uploaded as drawings rather than pictures of drawings.
- PNG and JPEG arrive as they are — full colour, transparency honoured, opacity still yours to set.
Some SVGs use gradients, filters or live text, which the studio cannot turn into the flat shapes a maze is drawn from. Rather than fail, it offers to convert: This SVG uses features that cannot be compiled — upload a rasterized copy instead? Accepting renders the drawing in your browser and uploads that, which means the result behaves like any other pixel image — including keeping its own colours.
Removing an upload takes it out of your collection and nothing else: Mazes that use it keep their copy. Your saved work does not change under you.
Credits#
Library artwork was drawn by somebody. The browser says who, under About this marker, and the section repeats it under the cards as a Credits line naming the author, the collection and the licence of every marker you have placed.
Some licences ask for that credit to travel with the work, which is exactly what the line is for — read it before you publish a maze commercially. Your own uploads have no origin to credit, so they simply read Your upload.
The solution#
The solved route between the two gates is a paint layer like any other. Its Solution section carries the tick that shows or hides it, plus its colour, width and corner style — Layers covers the full stack.
Hiding it changes nothing about the maze: the route is still there, still solved, and still exported the moment you tick the box again. The usual workflow is to solve on screen, then untick before printing the puzzle and tick again for the answer sheet.